Your Cart is Empty
Free Shipping All Orders +$45 *excludes B2B

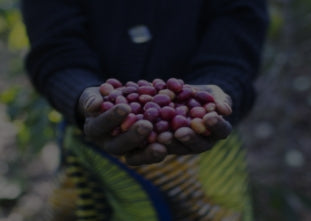
There’s tasting coffee, and then there’s coffee tasting. The former we do all the time, sipping out of toasty mugs and savoring the aroma and flavors in our delicious daily ritual – we taste according to the metric of our own preferences. And it’s good, right? So good. However, a coffee tasting, or cupping, is quite different. Built upon centuries of coffee expertise, a true cupping is guided by precise movements and ratios that ensure that all facets of the coffee are fairly judged; it’s both an enabler and an equalizer. It’s also way fun.
Although this can be done with any coffee, we recommend freshly roasted specialty coffees. Low-quality beans won’t be anything like as interesting, and you all know how we feel about freshness. For even more insight, cup more than one coffee at a time for comparison’s sake.

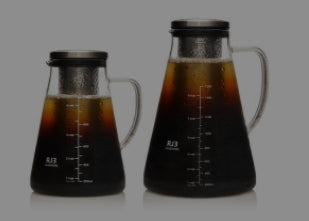
These are the various pieces of equipment and tools that we use in our cupping lab here. You may or may not have some of these items at home, but chances are, you can get close enough.


Your coffee will present different subtleties when dry and when wet. Before you add hot water to your coffee grounds, take a few good whiffs. We call this the fragrance. Write down anything that stands out to you about to you. Now let’s add water.
- Ideal water temperature is 200ºF. If you do not have a thermometer to measure your water temp. Let it reach boiling point and then allow it to rest for about 2-3 minutes.
- Slowly pour hot water onto grounds and fill the glass to the rim. Use the ratio previously mentioned.
- Allow the grounds to steep for 3-5 minutes before evaluation.
Once the grounds have finished steeping, it’s time for the next nose evaluation, this time with the wet grounds. We call this the aroma.
- Get your nose right up in there without dipping it into the coffee.
- Use your cupping spoon to part the grounds, which will release a burst of aroma from the coffee. We call this “breaking the crust.”
- Take a whiff as you part the grounds. Try to only make a couple passes with your spoon, so as to not over-agitate the grounds.
- Write down anything that stands out to you and compare your fragrance notes with your aroma notes.
The Mouth
Before you begin tasting, you’ll need to remove the grounds by shearing over the top with a spoon. The goal here is to clear a space for sipping, so only remove the grounds that have floated to the surface; those that have sunk to the bottom can be left. Once clear, we’re almost ready to cup!
- Once grounds are cleared away, allow the coffee to cool for a couple of minutes so it doesn’t burn your tongue when you go to taste it.
- Once the coffee has cooled to around 160ºF, you’re ready to cup.
- Use your spoon and scoop a spoonful of coffee.
- Bring the spoon to your mouth and slurp it… noisily.
- The goal is to aerate the coffee and spread it evenly over the entire tongue, delivering the maximum flavor and aromatic payload.
- Focus on specific flavor notes and jot them down. Think about how the coffee feels in your mouth: is it heavy and oily? Light? Smooth? Silky? Take several sips. Evaluate the initial taste and the finish.
- Optional – rinse your palate with mineral water between coffee samples.
When we cup coffee, we note the following aspects of the coffee:
- Fragrance / Aroma – How did the coffee smell? Any notable difference between dry fragrance and wet aroma?
- Flavor – Simply, how does it taste? What does it taste like? Do you pick up any kind of fruitiness, nuttiness, earthiness?
- Aftertaste – What elements of the aroma and flavors are left behind towards the back of your palate?
- Acidity – Often described as brightness. Is it bright and sharp? Is it sour? Is it dull and flat?
- Body – This refers to the tactile feeling of the coffee on your palate. We like to use the analogy of comparing skim milk to whole milk.
- Balance – Is there one note or characteristic that dominates or are do the notes compliment each other?
- Sweetness – Is the coffee sweet? Is it bitter? Any astringency or grassiness?
- Cleanliness – Does the taste dissipate quickly after you swallow? Does it linger on your palate?
The Specialty Coffee Association of America (SCAA) created the Coffee Taster’s Flavor Wheel – an incredibly useful chart designed to provide a common language for coffee flavors. It’s perfect for finding exactly the right word to describe what’s – literally – on the tip of your tongue.
All specialty coffees have the “formalized” cupping notes listed on the bag; now is the time to compare your own experience! There really is no right or wrong answer as different palates pick up different traces of flavor, but it’s a great way to confirm if you’re not sure.
Remember to have fun and enjoy the process!